Onramp with Stripe
The Stripe fiat-to-crypto onramp service (opens in a new tab) allows you to integrate a secure widget into your application that enables users to purchase cryptocurrencies using their credit card or bank account.
Prerequisites
- Node.js and npm (opens in a new tab)
- Stripe account (opens in a new tab)
- A web application using your favorite CLI and language. For example React with NextJS (opens in a new tab), Vue with Nuxt (opens in a new tab) or Svelte with SvelteKit (opens in a new tab).
- A deployed Safe for your users.
Integrate the Stripe fiat-to-crypto onramp widget
Obtain your public and private keys
To use the Stripe fiat-to-crypto onramp service, you need to obtain your public and private keys (opens in a new tab). You have to apply for the crypto onramp service and add at least your business address and information to your Stripe account. When your application is approved, you will find your public and private keys in your Stripe Developer Dashboard (opens in a new tab).
Install dependencies
First, install Stripe's client library.
Generate a new client_secret
To authenticate your users, you need to generate a client_secret to initialize the Stripe widget.
For this, you must make an API request to the Stripe API (opens in a new tab) using your Stripe private key.
It will return a unique client_secret that you can use to initialize the Stripe widget for your users.
To ensure you don't leak your private key, you should make the request from your backend.
The backend can then send the client_secret to your front end.
You can use the Stripe server example (opens in a new tab) as a starting point for your backend.
Here is how you generate a crypto onramp session using your private key:
Initialize the Stripe widget
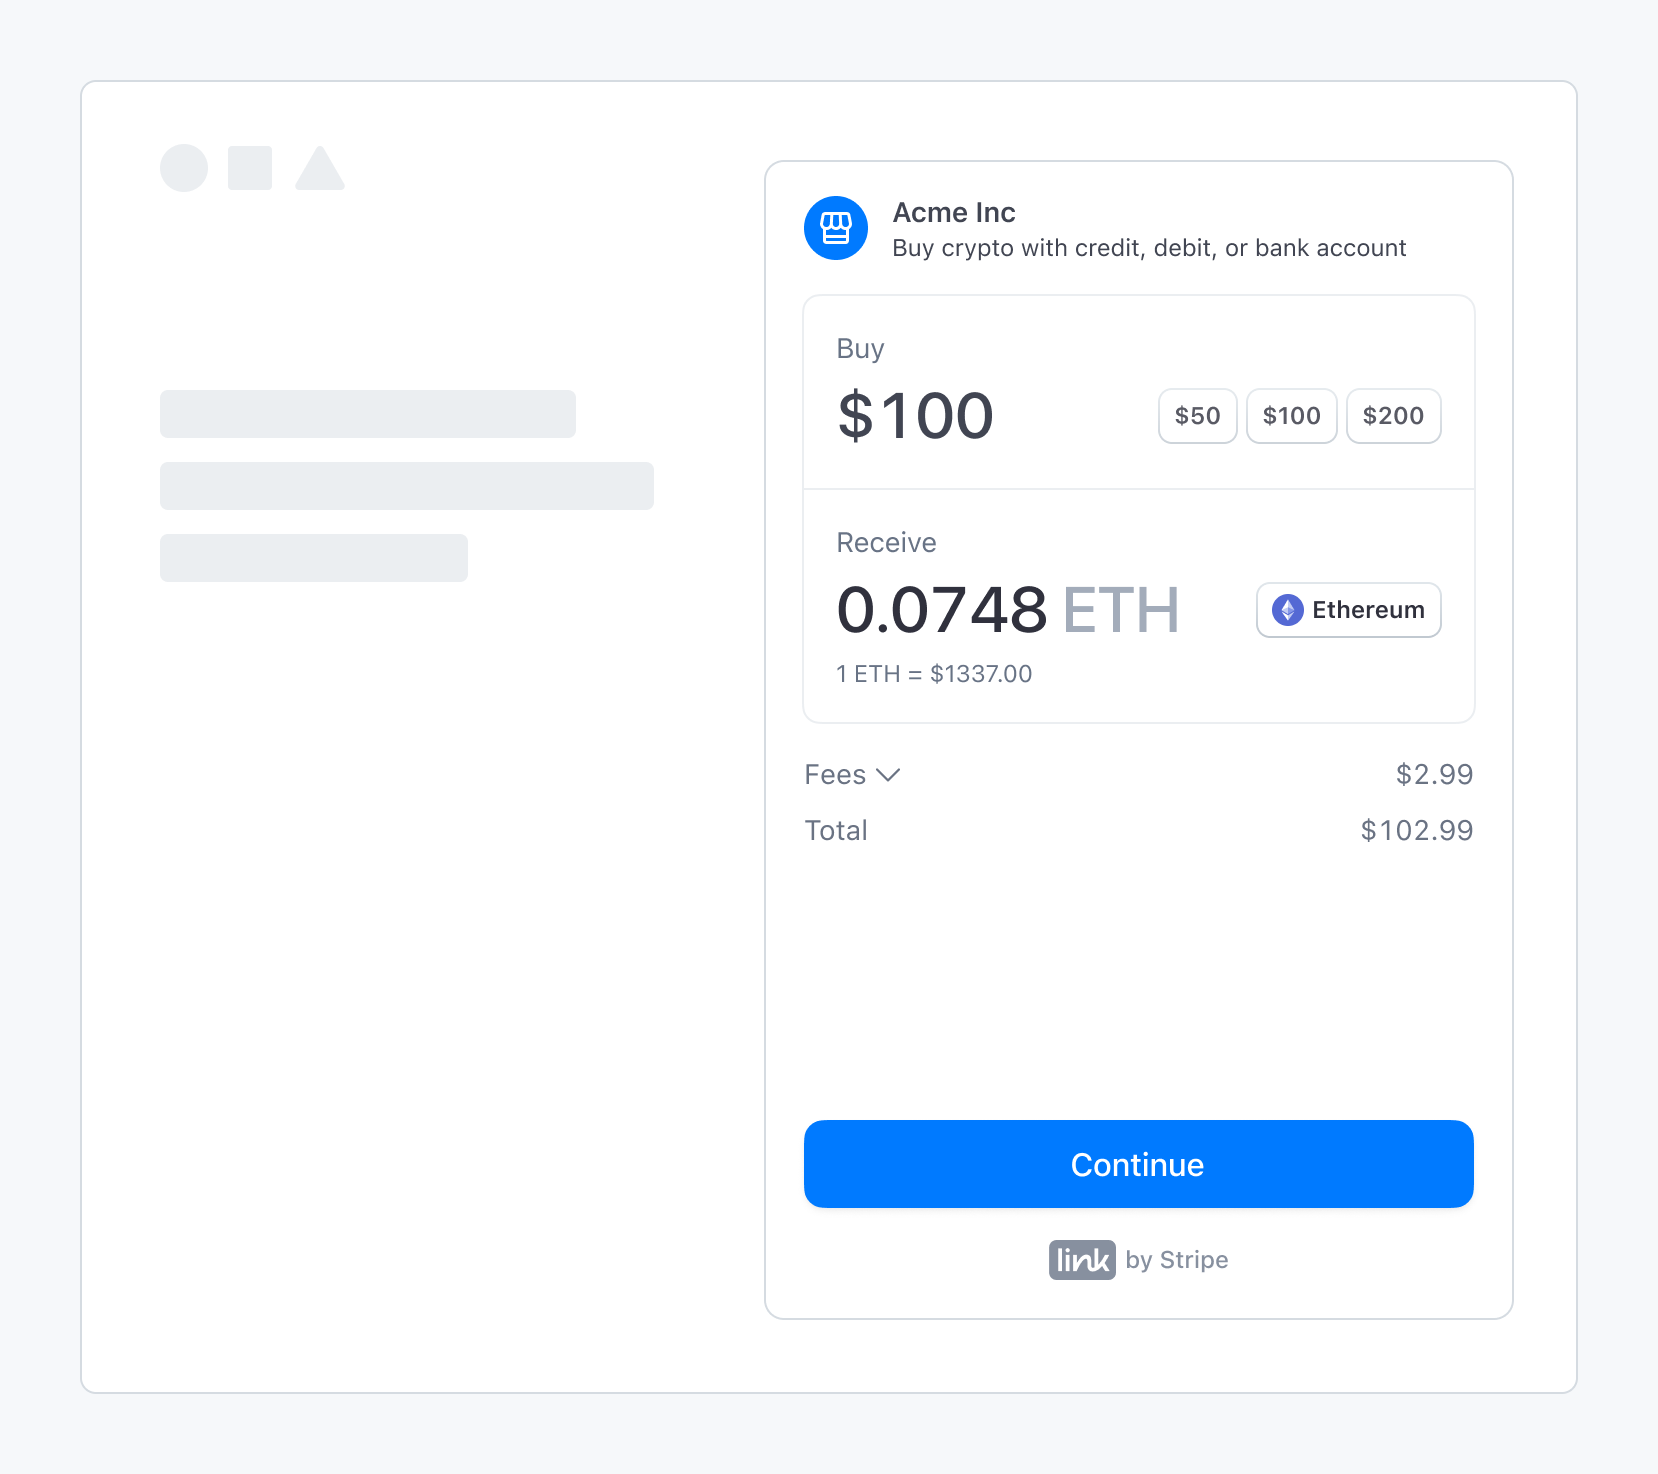
The Stripe widget is a secure iframe that allows users to purchase cryptocurrencies.
You can initialize the Stripe widget using the client_secret you obtained from the previous step:
Listen to Stripe events
You can listen to the frontend events (opens in a new tab) from the Stripe widget to update your UI or handle errors.
Now, Stripe will render the widget in the onramp-element div, allowing users to purchase cryptocurrencies securely.
Test the Stripe widget
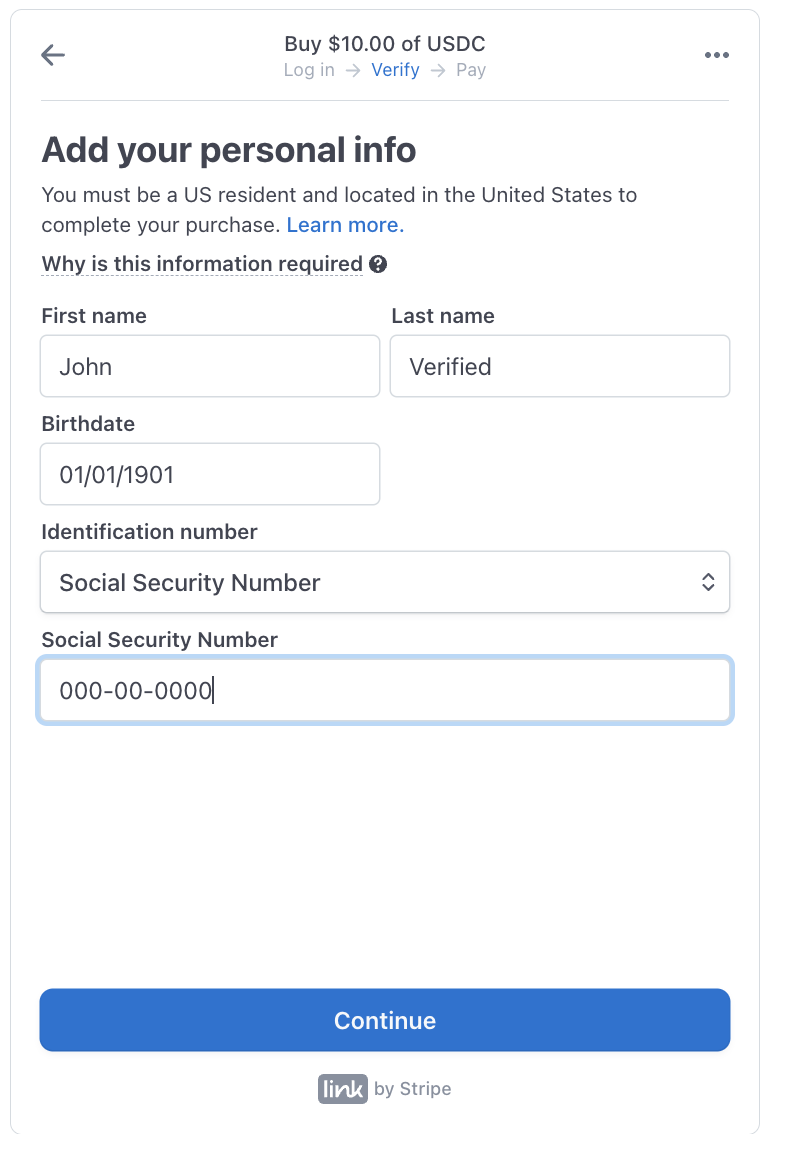
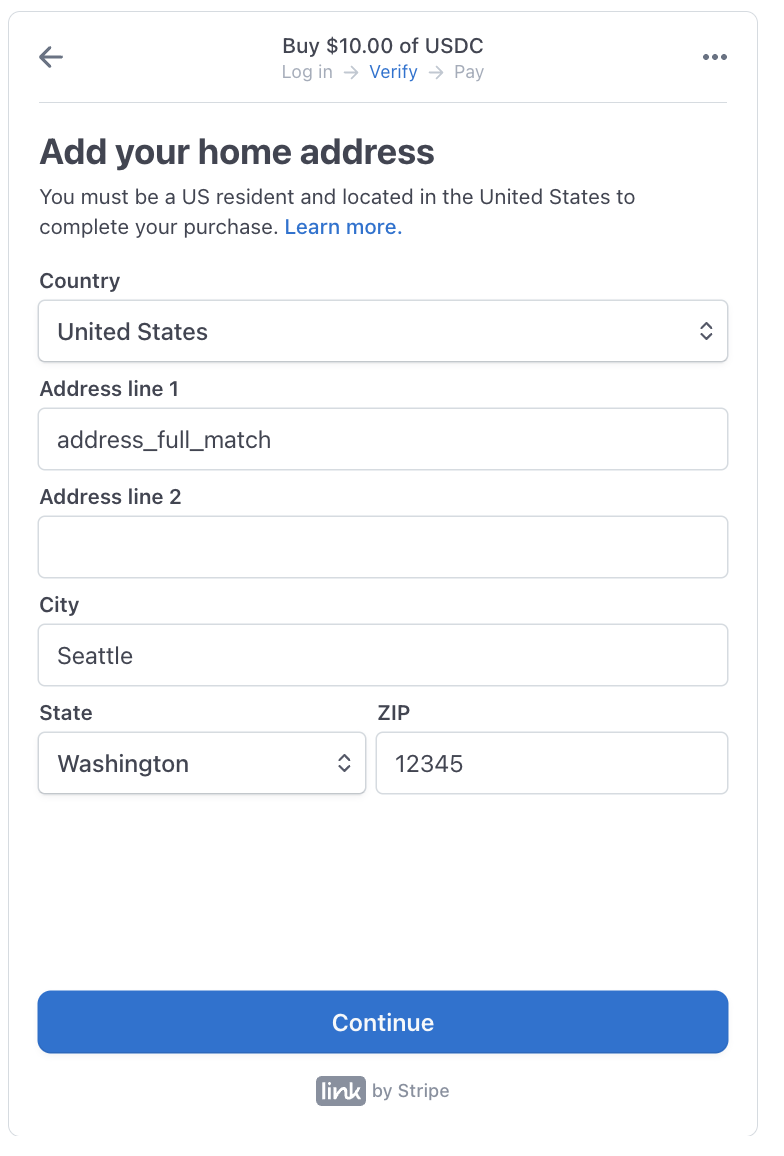
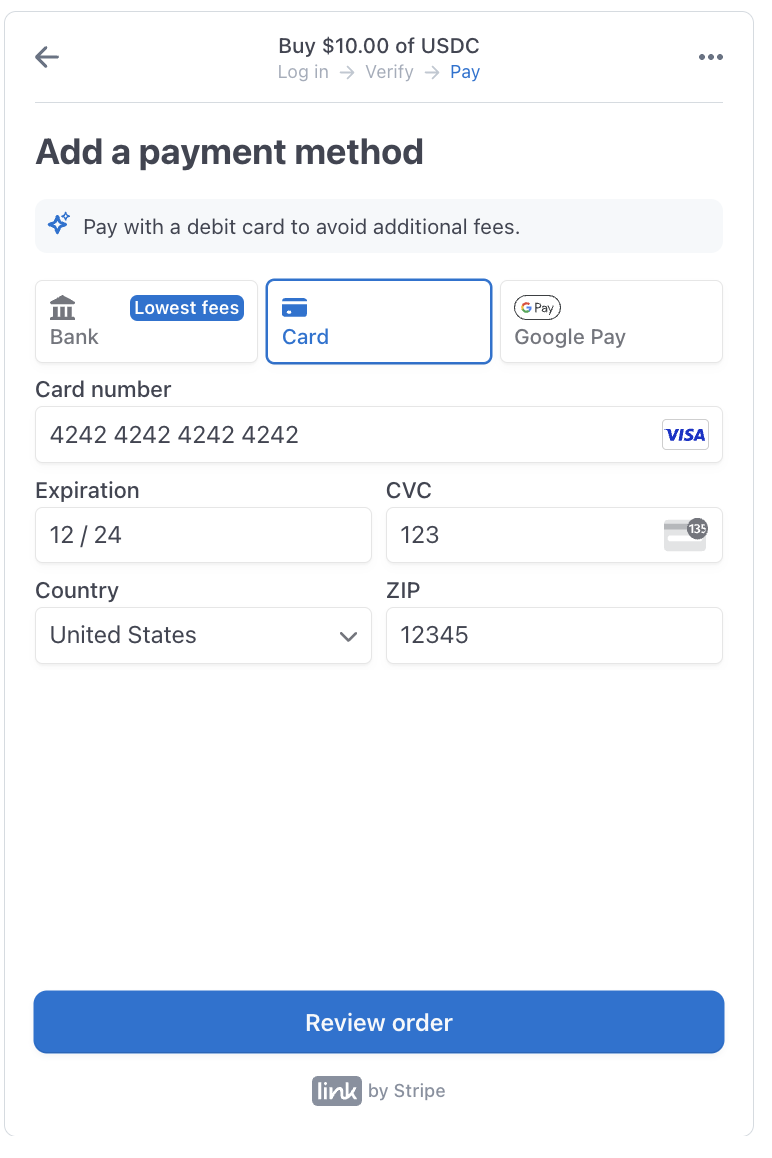
Test customer data
In production, each customer should pass an individual KYC process, but you should probably test your application before that. You can use the following test data to bypass the KYC process while in test mode (opens in a new tab). Make sure to select USD as the currency to buy cryptocurrency with.
| Field | Value | Description |
|---|---|---|
| your-email@example.com | Use any test or fake emails | |
| Phone Number | +18004444444 | Use +18004444444 for phone number |
| OTP Verification Code | 000000 | Use 000000 for the OTP verification code |
| First Name | John | Use any first name |
| Last Name | Verified | Use Verified for the last name |
| Birthday | January 1, 1901 | Use January 1, 1901 for successful identity verification |
| Identification Type | Social Security Number | Select Social Security Number for identification type |
| Identification Number | 000000000 | Enter 000000000 to fill the identification number field |
| Country | United States | Select United States for country |
| Address Line 1 | address_full_match | Use address_full_match for successful identity verification |
| City | Seattle | Use Seattle for city |
| State | Washington | Select Washington for state |
| Zip Code | 12345 | Use 12345 for zip code |
| Test Credit Card Number | 4242424242424242 | Use test credit card 4242424242424242 |
| Expiration Date | 12/24 | Use future expiration date 12/24 |
| CVC | 123 | Use any CVC 123 |
| Billing Zip Code | 12345 | Use any zip code 12345 for billing |
Example images for KYC and payment method
In the following images, you'll find examples of how to complete the KYC process and setup the payment method for a successful test purchase.
Personal Info
Address
Payment Method
These data will allow you to test the Stripe widget without passing the KYC process.
Conclusion
Well done, you have successfully integrated the Stripe fiat-to-crypto onramp service into your application. Your users can now purchase cryptocurrencies securely within your app.
If you have any questions or encounter any issues, contact the Stripe support (opens in a new tab) team.